In the CRM you have the ability to create one-off and targeted email campaigns. These campaigns can be used to email out promotions, special offers, ask for testimonials, send surveys, and more.
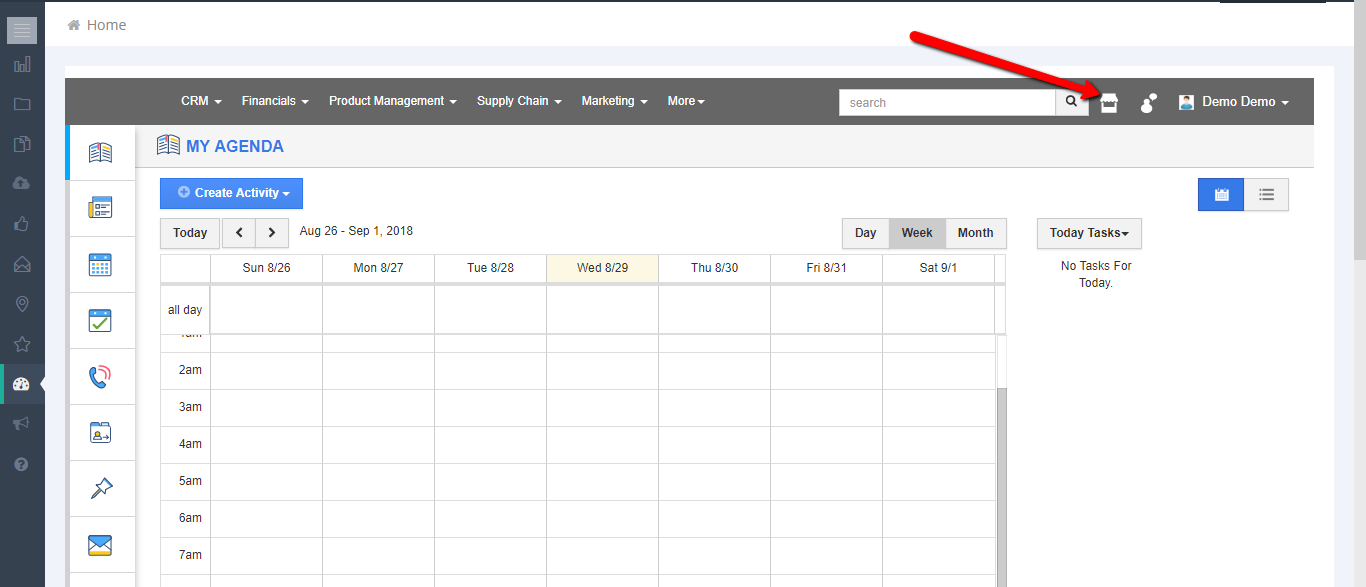
To get started, log into your account and go to your CRM Module.
First, you'll need to set up the "Targets" and "Campaigns" applications in your CRM.
- Click into the app store:
- Find the "Marketing" category, and add the "Targets" and "Campaigns" applications to your account.
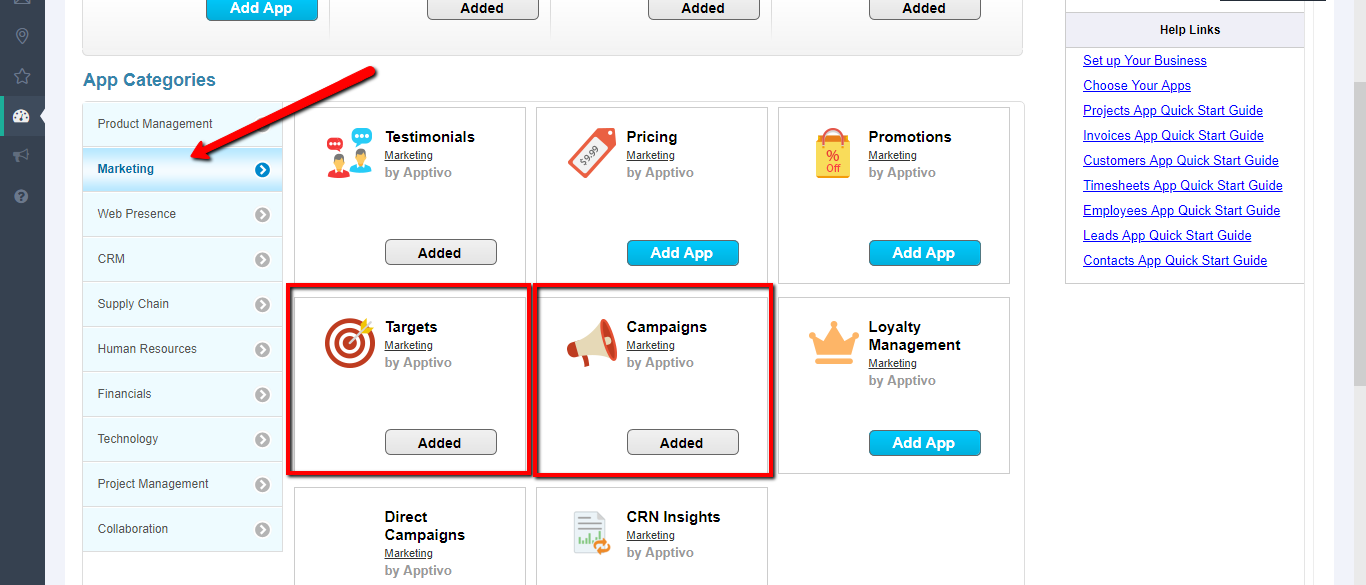
- Once the applications are added, click the "CRM" link again in the left hand menu to refresh the CRM. You'll then find both tools under the "Marketing" dropdown in your top menu.
- First you will want to create your target list. Follow these instruction here to get your lists built.
- Once you've built your target lists and are ready to send your campaign, go to the "Campaigns" application. The first thing you'll want to do is create the email template you'll want to use.
- Click the (...), then "Settings", and then click the Email link:
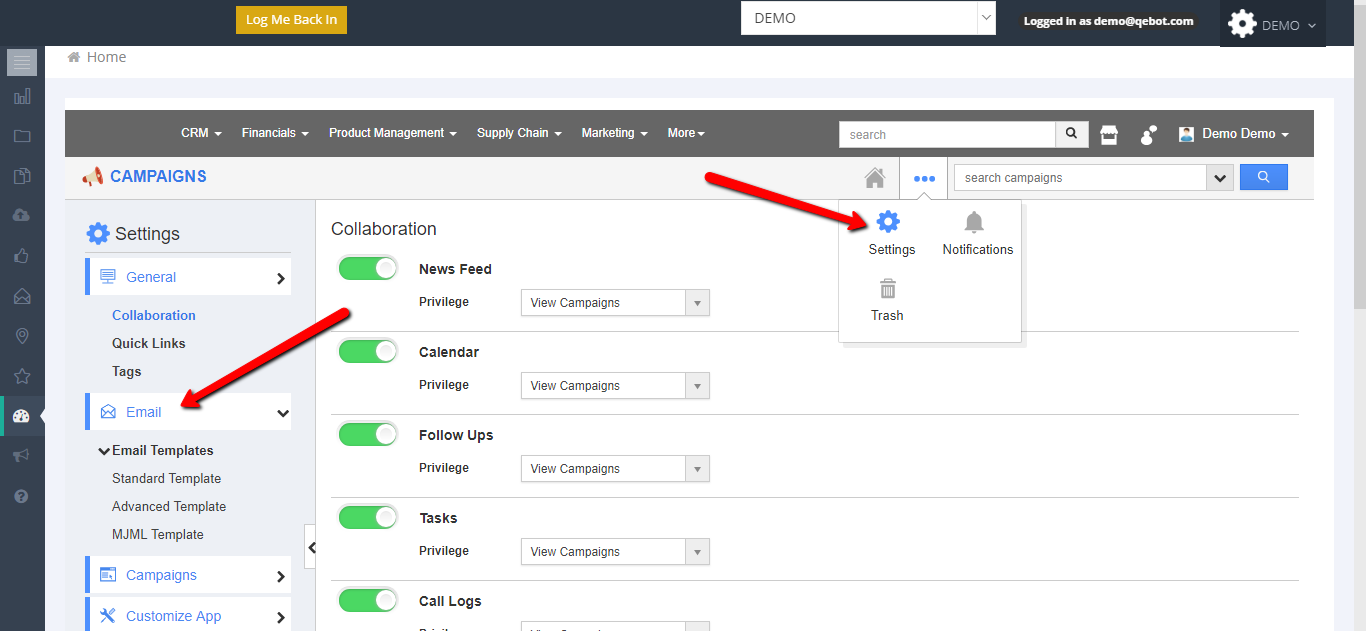
- Here you have your choice of creating standard templates that you will need to code yourself, Advanced Templates which give you a template base to work off of, and MJML (which is pretty similar to Advanced, but you can see what the template looks like before you choose).
- Once you've chosen your template, edit the look, feel, and content by using the drag and drop system in the Advance or MJML editor, or just the text input in the standard template. Click save to save your template for use in your campaign.
CREATING YOUR CAMPAIGN
Let's get started creating your campaign now that you have your list and your template set.
- First, go back to the home page of the "Campaign" app. Then click "Create."
- You have two options. Quick campaign will allow you to create a quick standard email template on the fly. The "Campaign" option allows you to select a template that you have created. Let's select "Campaign."

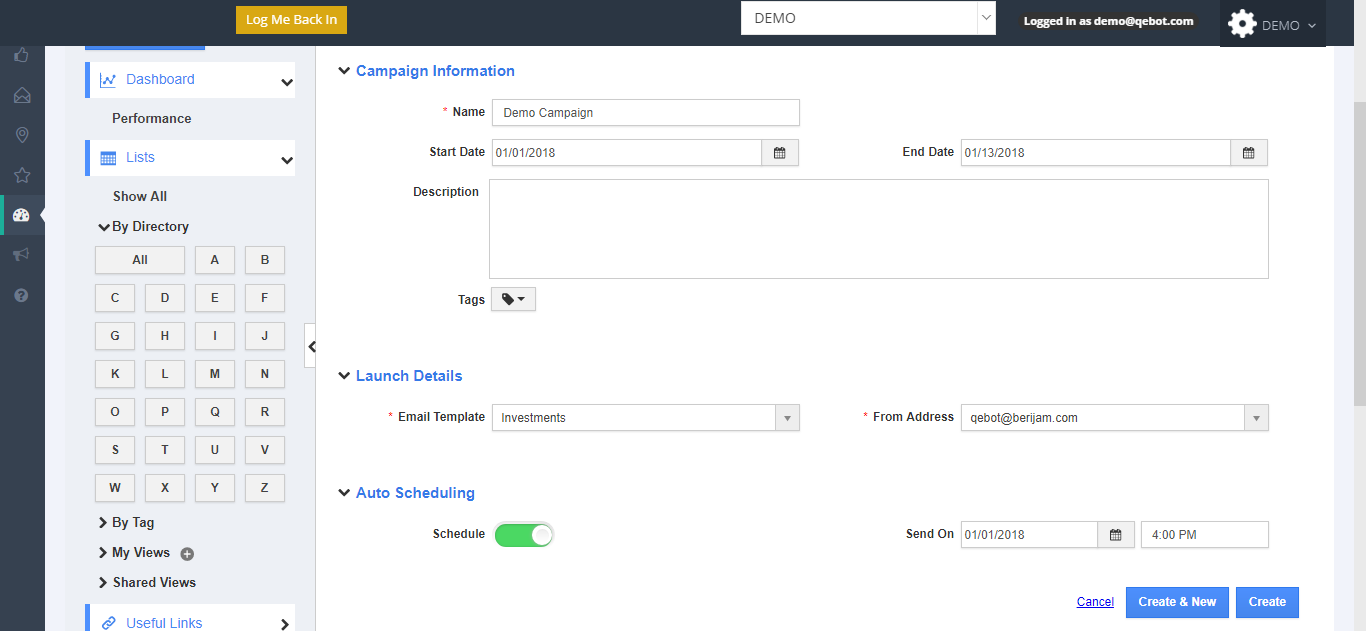
- Now let's enter the details of your campaign:
- Name: the name of the campaign
- Start Date and End Date will set the dates that you want to track the performance of your campaign.
- Description: add a description of the campaign if you wish
- Under Launch Details:
- Select your email template from the dropdown
- Select a "From" address that you'd like the email to be coming from.
- Auto Schedule: Select this if you want to send your campaign at a specific time. Then enter the time and date.
- Next, we're going to add our list that we want the campaign sent to:
- In the next screen, click the "Targets" icon, and then click "Add Target List"
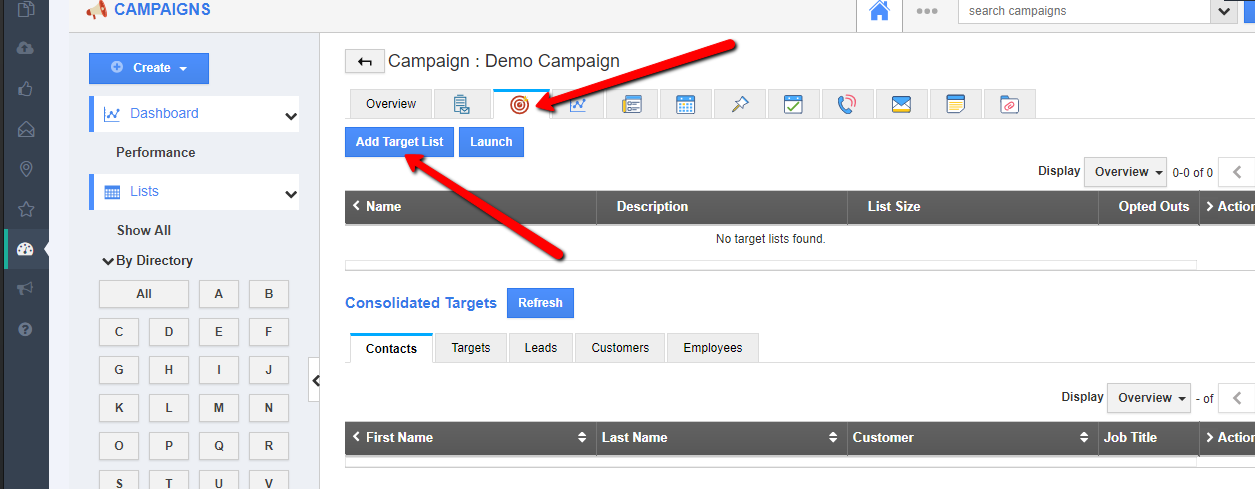
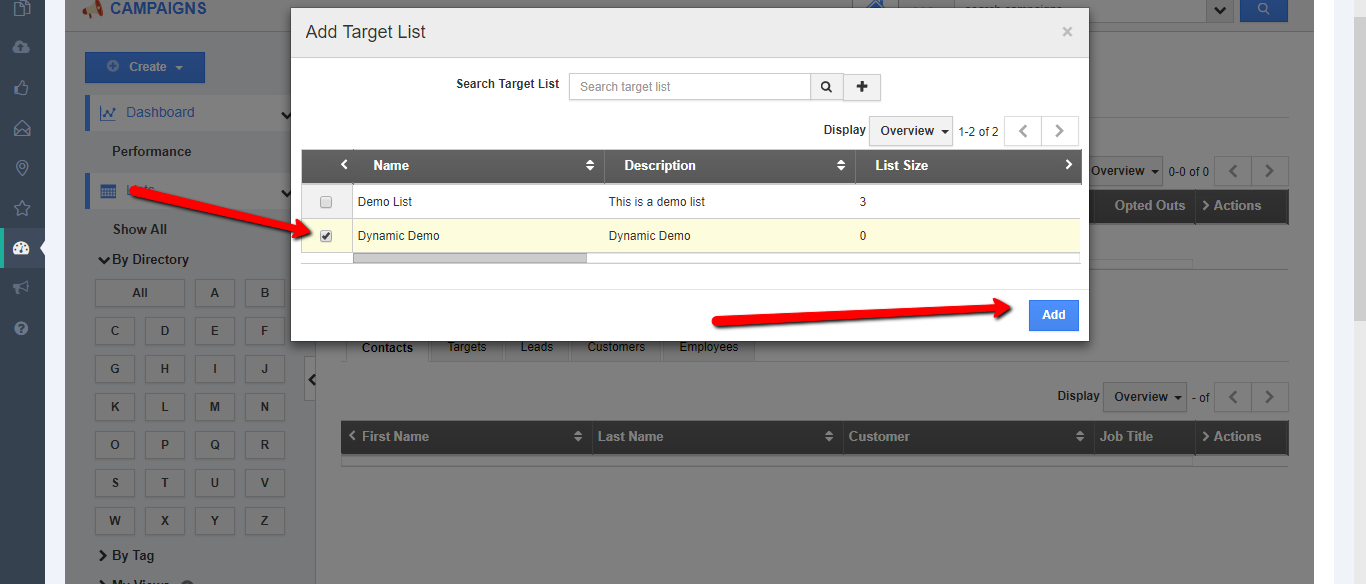
- Select your list, and click "Add"
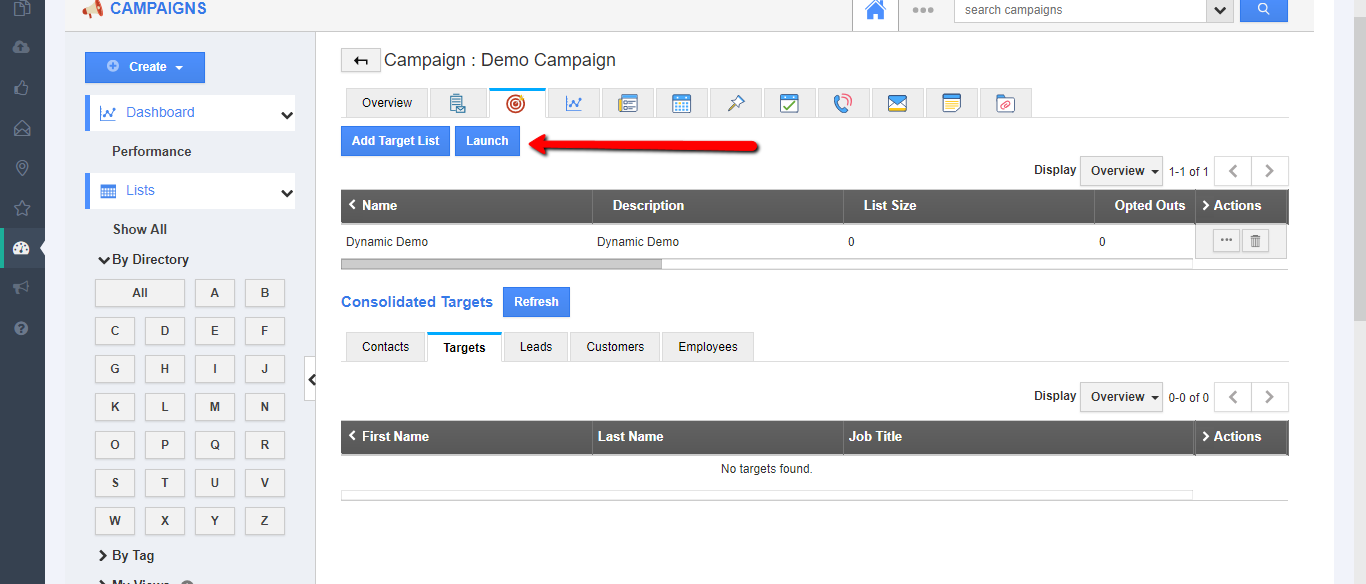
- Once you have your list attached, click the "Launch" button to launch your campaign. If you have not set a date/time for the campaign to launch, it will launch immediately. If you have selected a date/time, it will launch at that time.
MEASURING CAMPAIGN
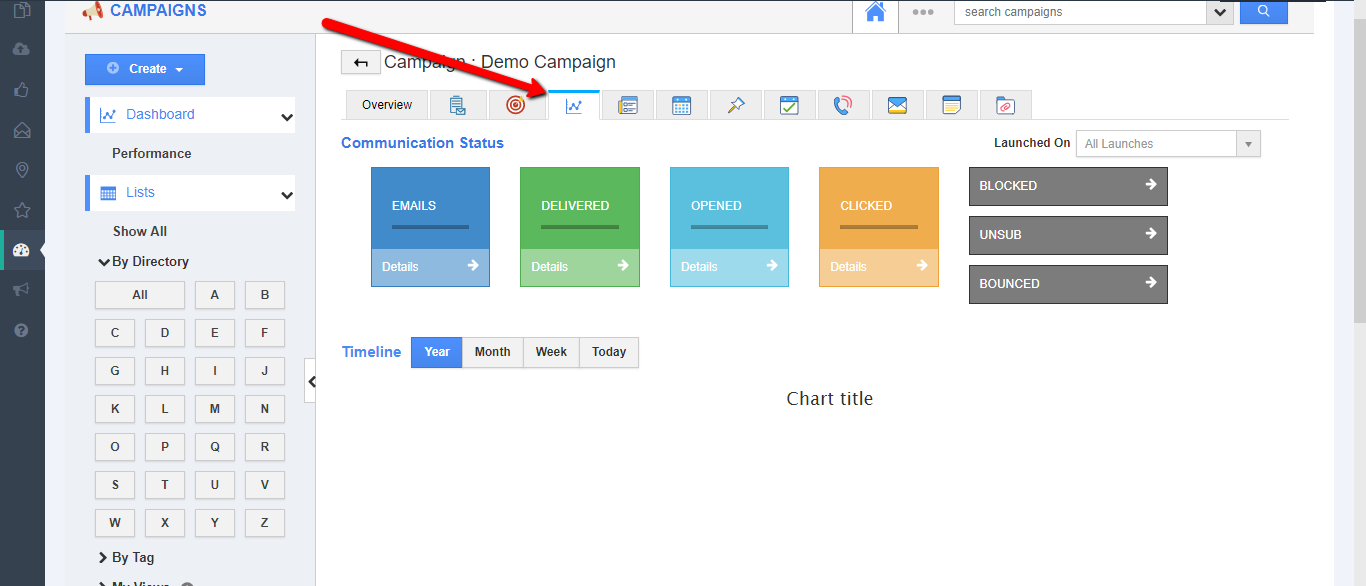
Now that you've launched your campaign, you can see how the campaign is doing by clicking "Dashboard" button. This will show you the analytics of your campaign, and help you understand how your contact list has engaged with your campaign.
That's it! You're campaign is on it's way and ready to measure.
Comments
0 comments
Please sign in to leave a comment.