Cases Basic Features
The basic features are the special features in cases. The following section describes each and every feature in detail.
Cases creation
- Collecting cases through emails
- Entering data in case creation page
- Collecting cases through API
Cases conversion
- Convert cases into projects
- Convert cases into work orders
Trash feature
- Deleted Cases
- Archived cases
- Restore
- Delete forever
Custom view of cases
- My views
- Views shared by others
Access privileges
- Collaboration
- Custom attributes
- Left panel views
- Reports
Service Level Agreement
- Create SLA
- Enable SLA
Cases Creation
Cases App supports you to track all the information from customer complaints or requests about a product or service. Cases can be created in three different ways:
- Creating cases manually
- Collecting cases through emails
- Collecting cases through API
Cases Creation
- Entering data in case creation page: You can enter the case details manually.
- Capturing cases through emails: You can authenticate your email address in Cases App settings to collect case details through customer emails. These details are captured directly in the Cases App.
- Collecting cases through API: You can integrate API key to your website for collecting cases from API http://www.apptivo.com/developer-api-guide/api-reference/
Entering data in case creation page
- Create case by clicking on “Create Case” button in the left navigation panel.
- Provide the following information:
- Case# – This is an auto generated or manually entered number to identify cases.
- Type – Select a type from a predefined list.
- Status – Select a status from a predefined list.
- Priority – Select a priority from a predefined list.
- Assigned To – Name of an employee. Search and select an existing employee.
- Summary – Summary about the case logged.
- Description – A short description about case.
- Item – search and select item which is related to a problem.
- Project – search and select projects from the existing list.
- Need by Date – Date of case logged.
- Date resolved – Resolved date of a case.
- Customer – Name of the customer. It may be an existing customer or newly created.
- Contact – Name of the contact. It may be an existing contact or newly created.
- Click on “Create” button to complete.
Collecting cases through emails
You can automatically create a case when a customer emails you for support. You can use email ids or aliases to receive emails from your customers.
Email authentication
In order to receive emails in Cases App, you need to authenticate your email address in IMAP settings.
- Receiving Email Account – Your Email address for authentication.
- Password – Enter the password of your email address.
- IMAP Host Name – Host name of your email address for example: if you have Gmail account then host name is “imap.gmail.com”.
- “Addressed To” Email Account – Either you can choose same account or can redirect to email list.
- Port – port number of the domain for example: port number for Gmail is 993.
- Assigned To – Select an Employee to whom it should be assigned automatically.
Creating cases from emails
Once you’ve authenticated your email address, all your receiving emails will be collected as cases in Cases App.
Custom View of Cases
You can use grouped viewing to set up a view column to show custom fields of cases. The example below shows you a view that groups all fields according to a view column set we created.
You are allowed to save your custom view and share with your users.
Custom views of cases are:
- View Column Set
- My Views
- Views Shared by Others
- View column set
You can view cases with your preferred columns (fields) by default, you are provided with the peculiar feature which allows you to customize your own defined fields.
- In Settings, click on “View Column Set” from the left navigation panel.
- Click on “+” icon to add column set.
- Enter the name for column set.
- Choose your preferred fields to view Cases list.
- Click on any view to view your cases list. Choose your column set that you added.
- You can able to view the customized fields as shown in the image below:
By default you can view fields such As Case #, Status, Type, Priority, Assigned To and Summary.
If you want to view more case information, you need to select fields from “Display” field.
You can save our custom view of case information for your future reference in “My Views”.
The example below shows you my views:
- Choose your preferred columns(fields) to display from “Show All”.
- Search and save the result.
- You can view the saved views in “My Views”.
In order to share your views with your employees, you must enable the “Share with other Users” option. While saving your custom view you must enable the option to share with other users. This allows your user to view the shared views in their account.
You can view the views shared by others in your account.
Click on “Shared Views” from the left navigation panel.
Cases Conversion
- Cases App Documentation
- Cases Dashboard
- Cases Attributes
- Navigation
- SLA – Service Level Agreement
- Cases Basic Features
- Cases Creation
- About “Trash”
- Custom View of Cases
- Cases Conversion
- About "Trash"
- Configuration Features
- Convert cases into projects – Case conversion allows you to convert all the case information into a project, you can also add the team to follow up case.
- Convert cases into work orders – Cases can also convert to work order from where you can schedule an appointment, provide services for the case and get the approval from customer.
Convert cases into projects
- Create a new case or select an existing case to be converted.
- Click on “Convert” button.
- Choose “Project” to convert.
- On the project creation page (Projects App), Fill in the following details:
- Name – Name of the Project.
- Description – A short summary about a project.
- Start Date – Starting Date of the project.
- End date – Ending date of the project.
- Status – Status of the project.
- Priority – Priority of the project.
- Customer – Name of the customer, this will be pre populated from Cases App.
- Billing Method – Select a billing method from a predefined list.
Convert cases into work orders
- Create a new case or select an existing case to be converted.
- Click on “Convert” button and select “Work Orders”.
- On the work order creation page (Work Orders App), fill in the following information:
- Customer – Customer name will be prepopulated from case.
- Contact – Select a customer associated contact or create new.
- Approver – Name of the customer.
- Sales Order – Order created for customer.
- Work Order # – This is an auto generated or manually entered to identify the work order.
- Case – Case number will be pre populated from case.
- Assigned To – Employee Name will be pre populated from case.
- Reported Date – Date of reporting.
Configuration Features
Collaboration
Collaboration allows you to customize associated information with activities like News feed, Calendar, Follow up, Tasks, Call logs, Emails, Documents and Notes. Click on “Show/Hide” button to enable/disable information.

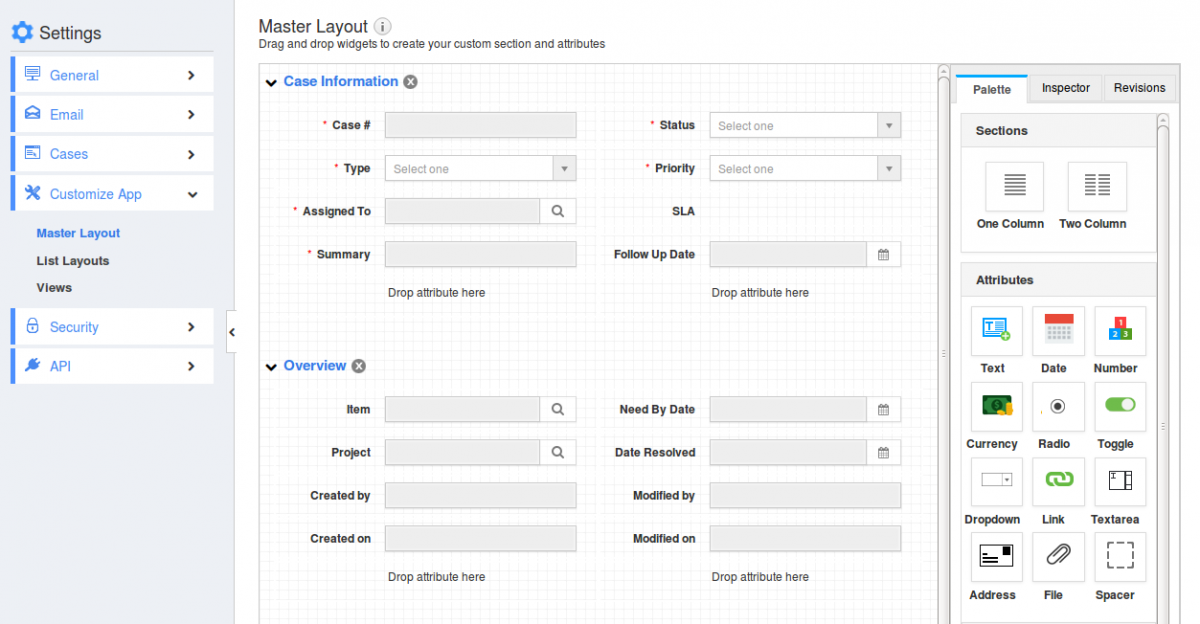
Customize App
Customize App provides fields that are unique to your business. Custom attributes allow you to add any custom fields not provided in the creation page. Custom attributes include Sections and Attributes.
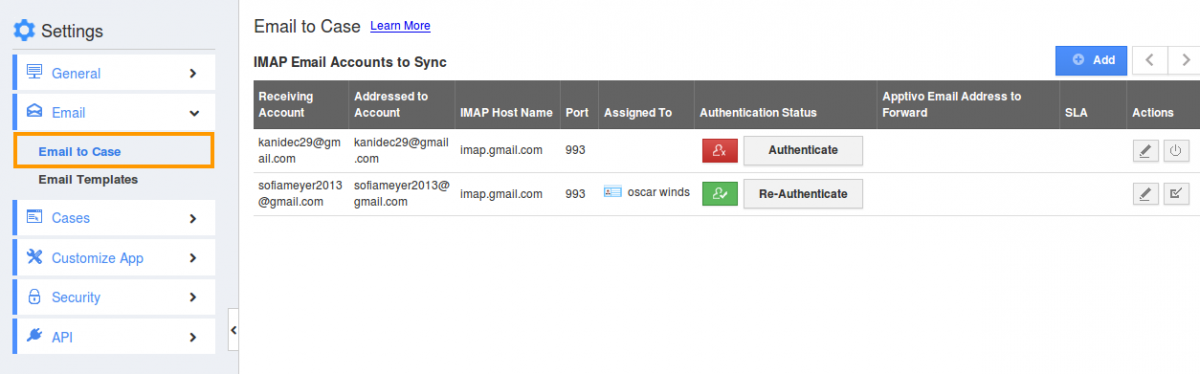
Email to Case
Email to case helps to capture Customer emails as cases. Provide IMAP email accounts to monitor by clicking “Add” button. Turn On/Off to acknowledge when a case is created. Click on “Edit” button to update acknowledge subject and message, if needed.
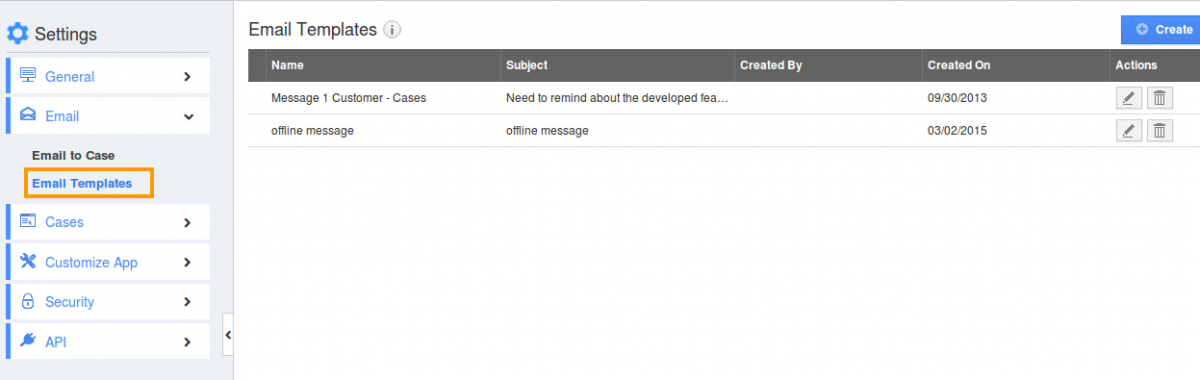
Message Templates
Message Templates allow you to set up predefined messages. These are customized email messages that you can send to your customers Message templates can be used with any email sent from Cases App, they are also used for auto-reminders.
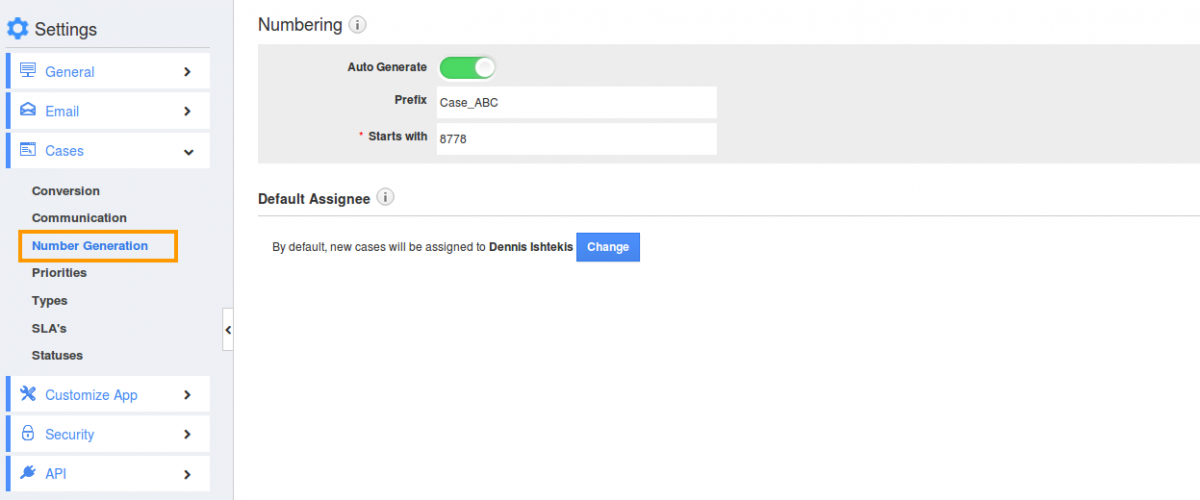
Numbering
Case Number Generation:
You can either enter a case number manually or automatically generate. You have to provide a starting number and prefix for automatic generation.
Default Assignee:
Select Primary Employee/team for whom new cases should be assigned by default. Click on “Change” button and select an employee from the list.
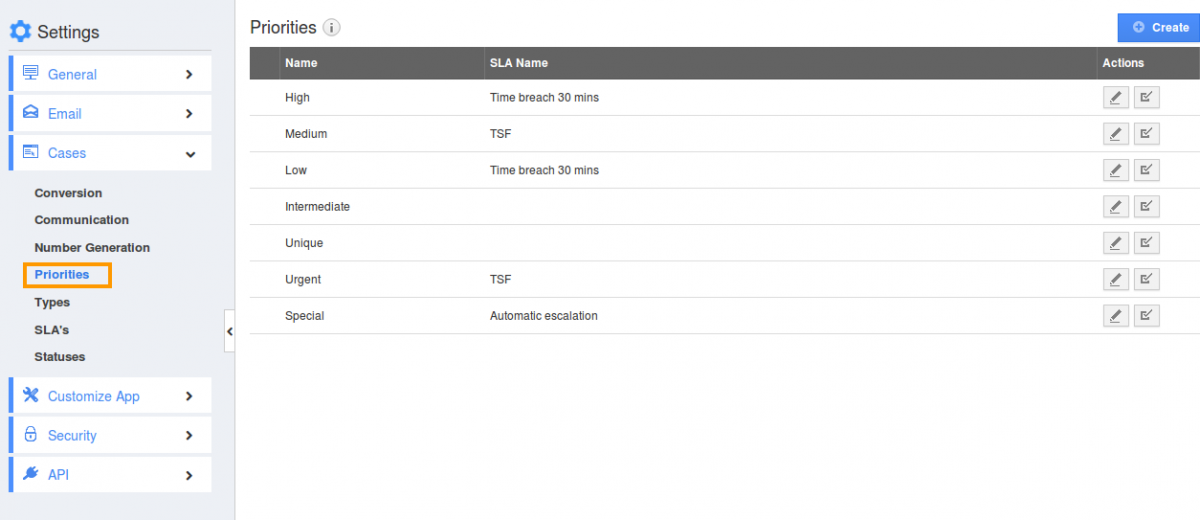
Priorities
Priorities indicate how quickly the case needs to be resolved. You can create priorities by clicking “Create” button on priorities settings page.
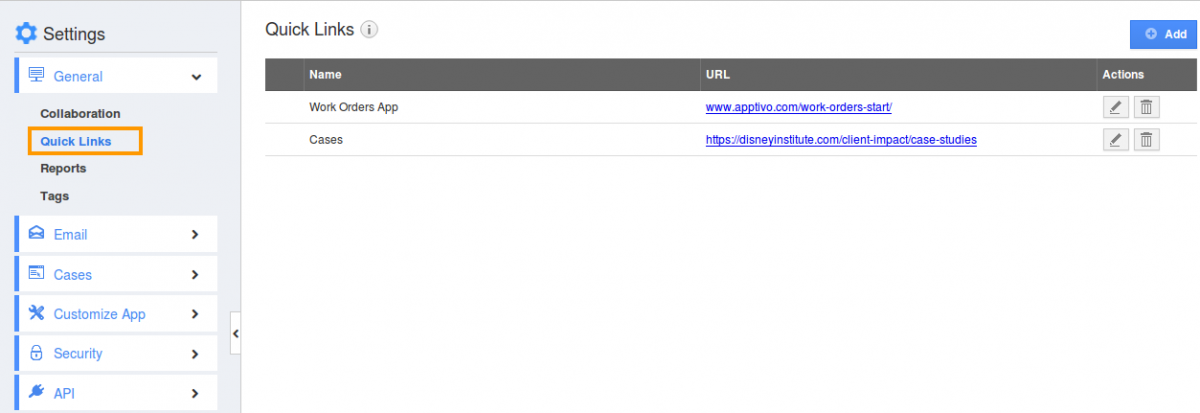
Quick Links
You can add your own reference links for this app. These links will display on the left panel under the “Quick Links” menu. Click on “Create” button to add new quick links.
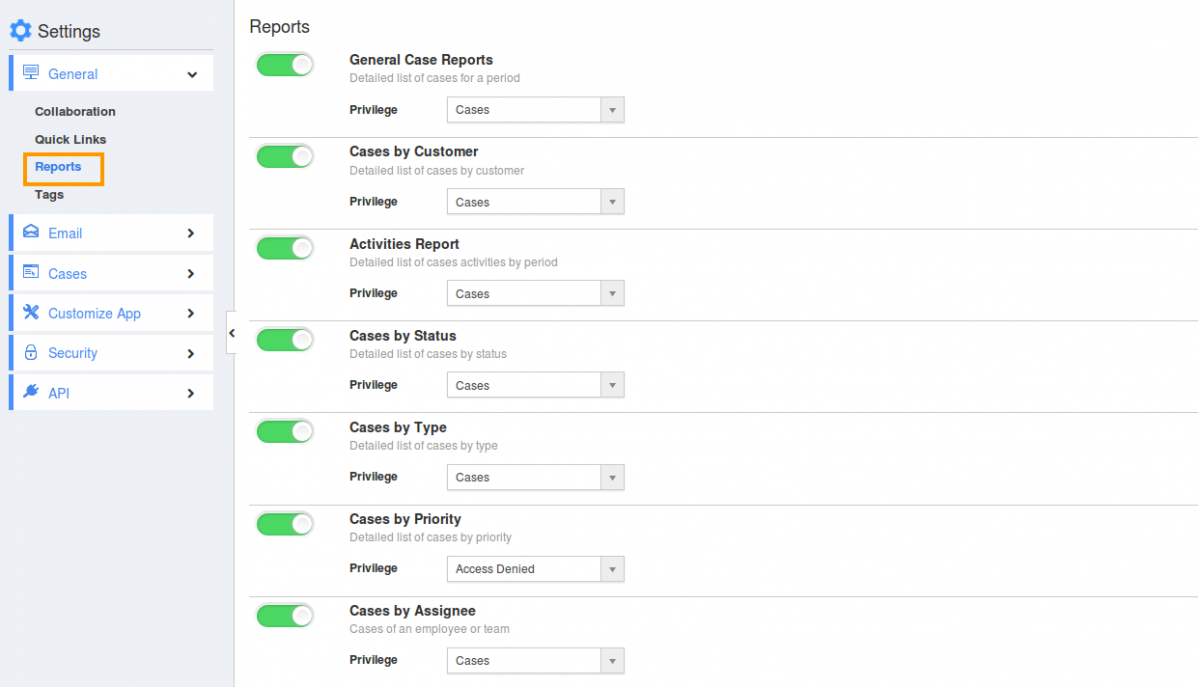
Reports
This allows you to customize reports to be shown in the dashboard, It includes:
General Report
Click on “Show/Hide” button to enable/disable reports.
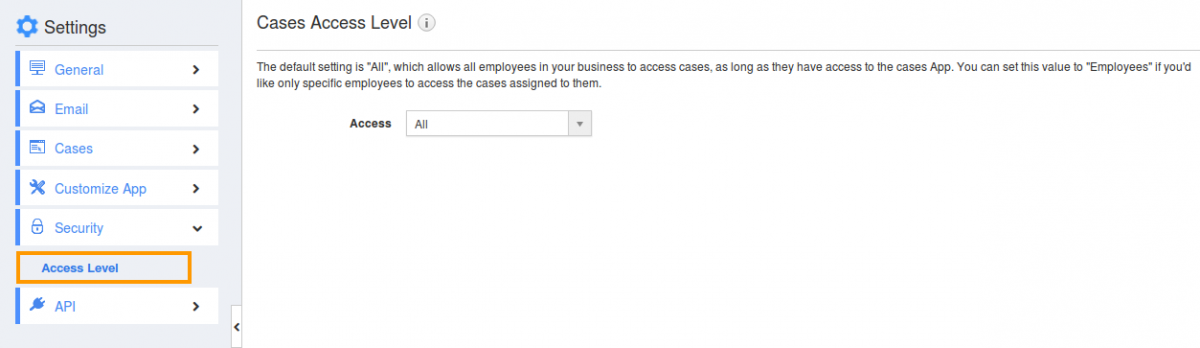
Security
Cases Access Level allows you to provide access to Cases App. There are 2 options: Everyone with access to the cases app – Any user with access to Cases App can view all cases. Specific employees – Only employees who are assigned to work on a case can access it.
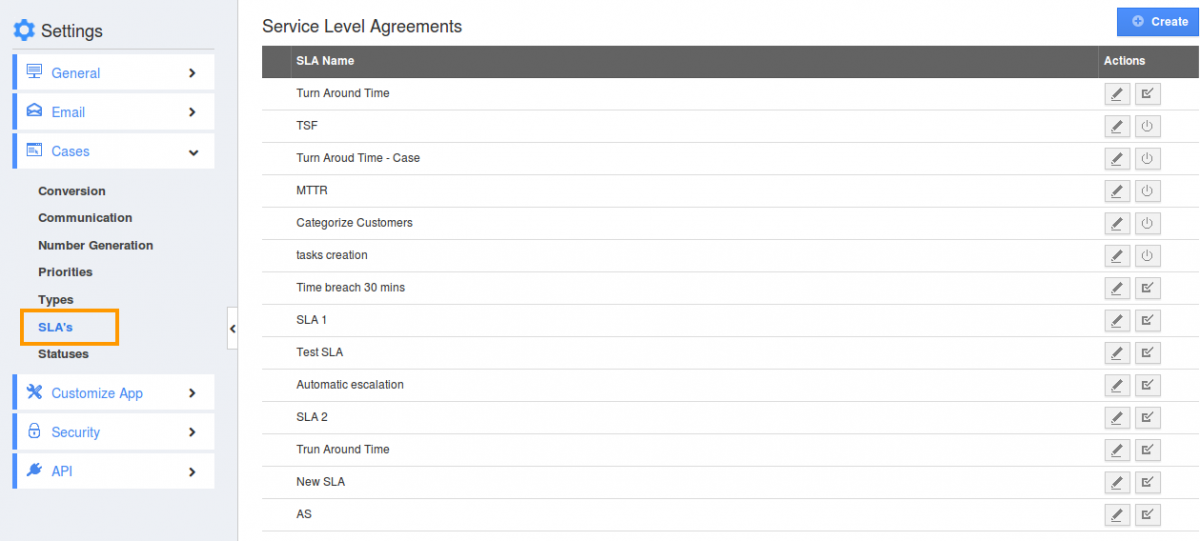
SLA’s
Service level agreements allow you to add SLA’s for your cases. Click on “Create” button to add new SLA’s in the dashboard.
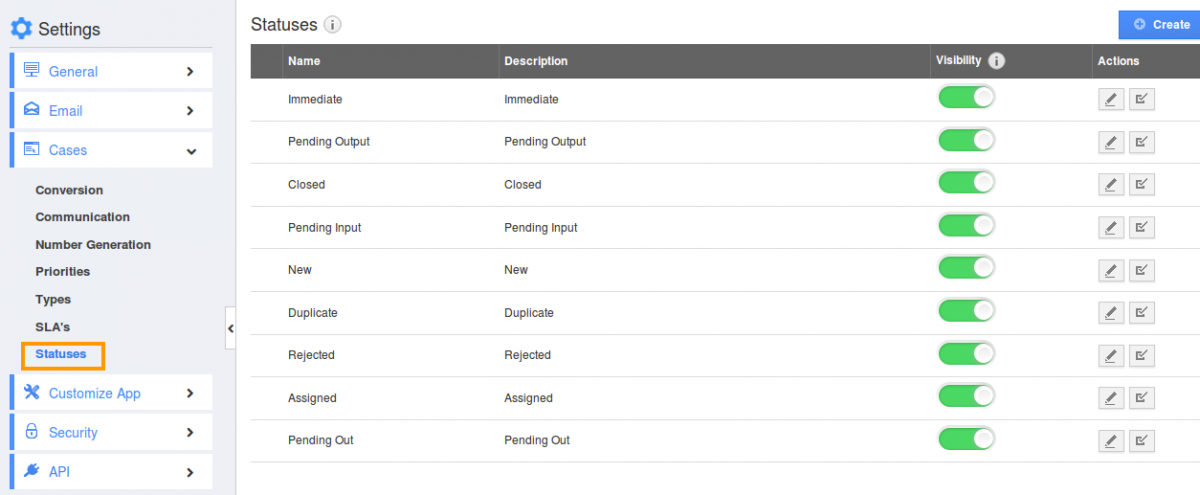
Statuses
Statuses allow you to identify different status of cases. You can create status by clicking “Create” button on case statuses settings page
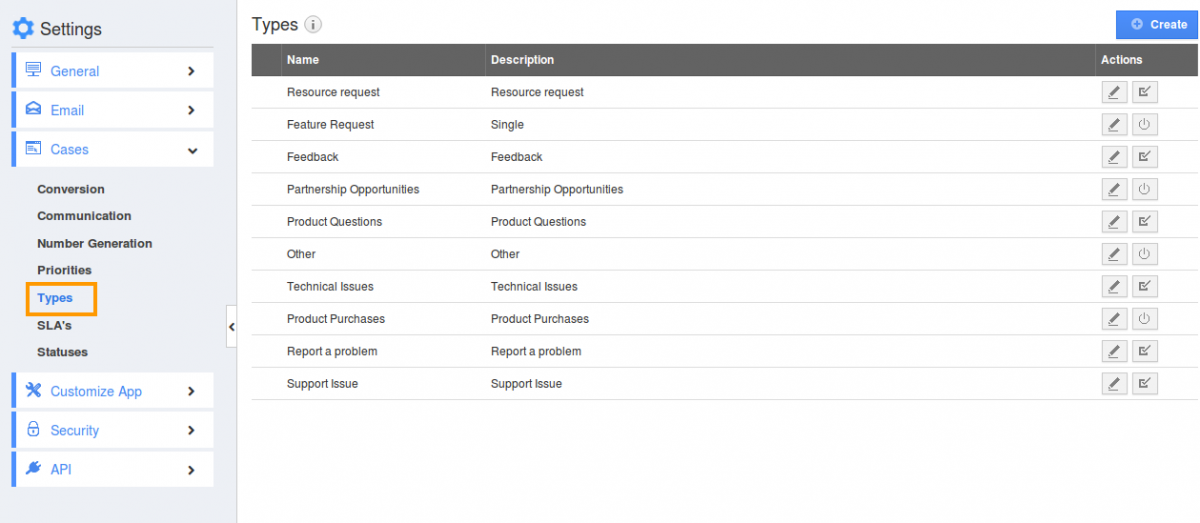
Types
Types help you to categorize and segment cases. You can create types by clicking “create” button on types’ settings page.
Views
Default Home Page View
It allows you to set default home page view, which includes:
- Cases Home
- Show All
- By Queue
- To Follow Up
- By Status
- By Type
- By Priority
Left Panel Views:
Views found on left navigation panel, are filters that allow you to access cases within the app. You can show/hide views in configuration, but you must at least enable one view. Click on “Update” button to apply settings.

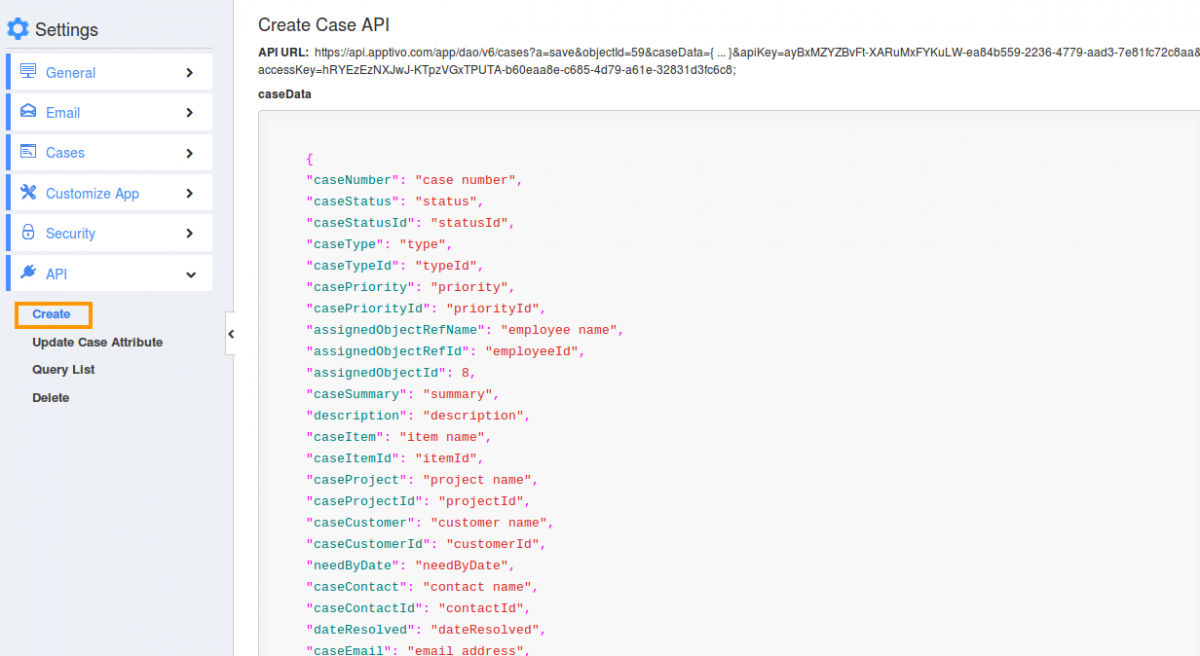
API
Cases API provides following four API configurations:
- Create Case
- Read Case
- Update Case
- Delete Case
Comments
0 comments
Please sign in to leave a comment.