Thanks to new functionality via Facebook/Instagram's API, we are now able to support adding Instagram Geolocation tags to post. This article goes through the steps on how to add a geolocation tag to your post.
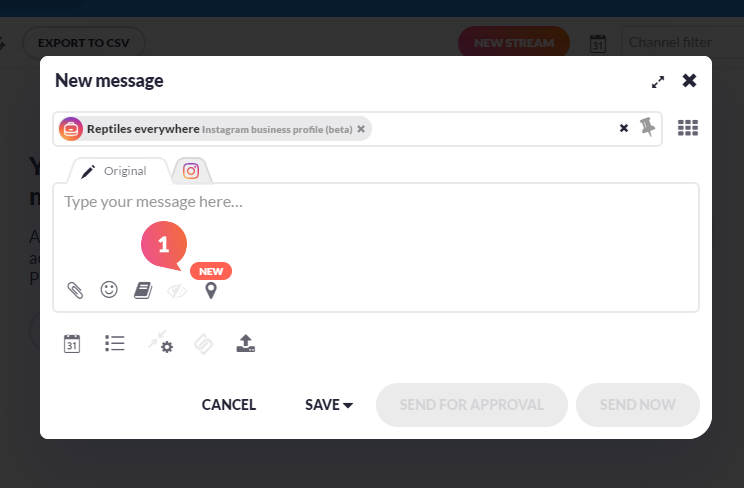
1. Select the Instagram Business profile you wish to compose a message to. Once you've selected your profile, you will see a new location icon within the toolbar. Click on this icon to add your geolocation tag.
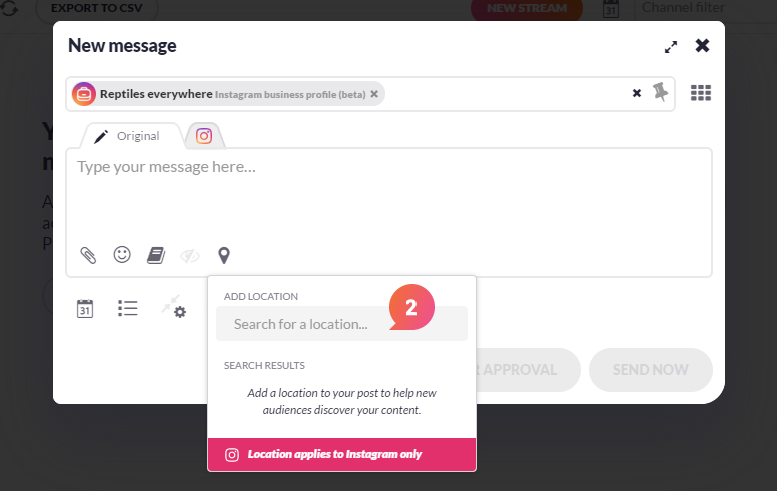
2. When you've clicked the location tag icon a box will open with a search bar where you can add in the location tag you wish to add.
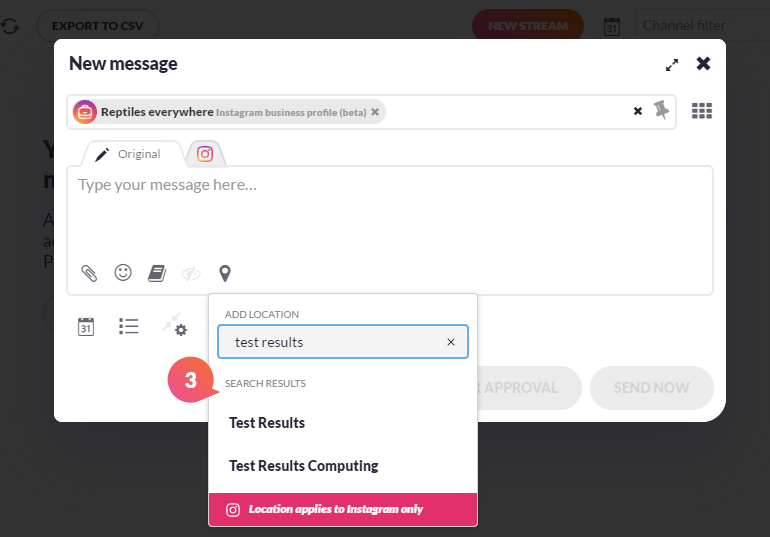
3. The behaviour of the location results will work by displaying the most local location to you first, if this isn't the result you are looking for you can scroll for other results or specify your search further.
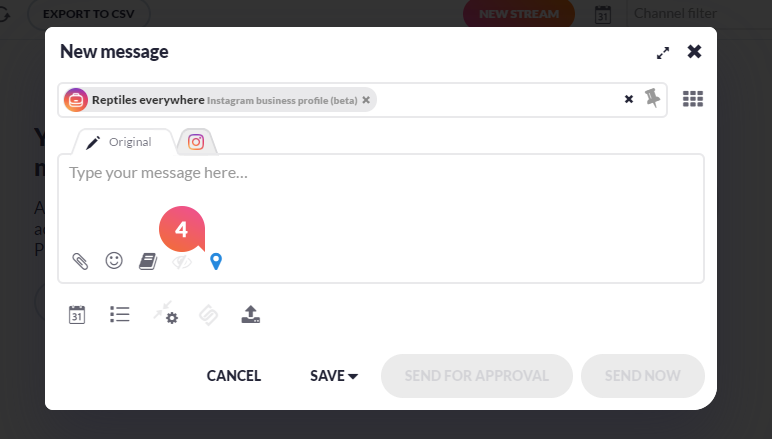
4. Once you've added the tag you wish to use the pop-up will close and the icon will appear 'blue' within the toolbar which signals the tag has been added.
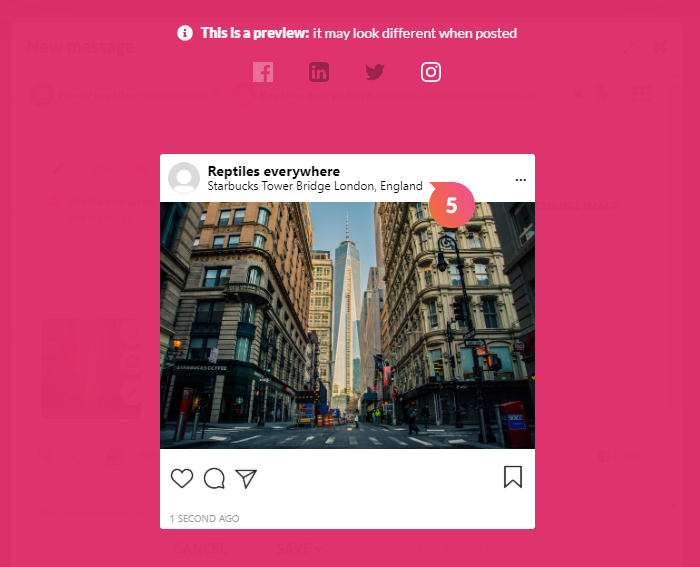
5. When you are ready with your message, if you click on the post preview icon, you will then be able to see the location tag appended to the message so you can see how this looks before scheduling.
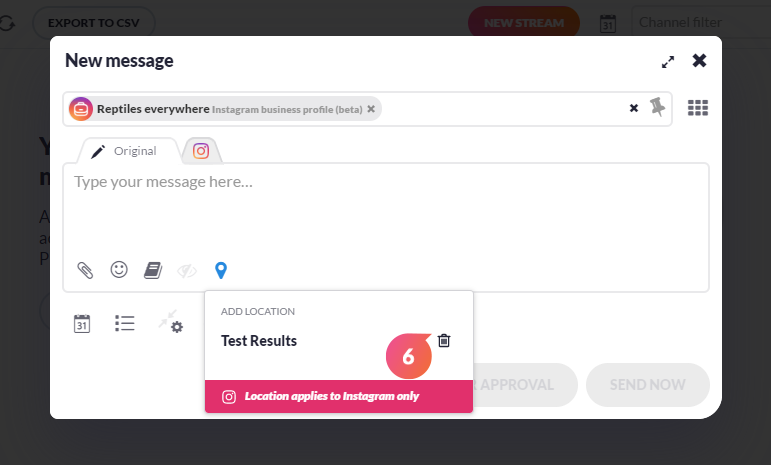
6. If you wish to change or remove the tag, click back onto the location icon and select the 'bin' icon to remove the tag. You can then add in a new tag closeout from this view so that no tag is added to your post.
Comments
0 comments
Please sign in to leave a comment.