Introduction
Opportunities App allows you to easily keep track sales opportunities and organize your efforts to close deals. The opportunity is the second phase of the sales stage, being converted from a lead, and can be converted to an Order once a deal is reached.
Integration
All apps are deeply integrated which communicate with one another. The qualified Opportunities can be converted as Order, Estimates, Invoice and Projects.
Features
- Entering data in the opportunities creation page
- Associate opportunities with Other Records
- Generate reports to keep track of records
- Converting Opportunities into Order, Estimates, Invoice and Projects.
- Customizing left panel views
- Customizing default column view
Opportunities Attributes
| Opportunities Information | |
| Name | Name of the Opportunity. |
| Sales Stage | select sales stage from predefined list. |
| Customer | Select customer from predefined list. |
| Probability | Set the potential amount. |
| Contact | Select contact from predefined list |
| Type | Select the type of opportunity from predefined list. |
| Lead source | Select lead source from predefined list . |
| Close Date | Choose estimate closed date from calendar picker. |
| Next step | Enter the text for closed deal |
| Assigned to | Select employee, who this opportunity will be assigned to, by default, it is assigned to the person creating the opportunity. |
| Campaign | Search and select the type of sale (or) Create a new campaign with click of “Add New icon”. |
| Description | Description about opportunities. |
| Company Information | |
| Territory | Territory of the opportunity. You can select territory from pre defined list with click of “Search” field. |
| Market | Market of the opportunity. You can select market from predefined list or create new market with click of “Add New” in drop down box. |
| Segment | Segment of the opportunity. You can select segment from predefined list or create new segment with click of “Add New” in drop down box. |
Opportunities Navigation
Left Navigation
-
Create opportunity – You can create opportunity by entering pertained informations in appropriate fields through create opportunity page. Hit “Create & New” button to save and continue creating new opportunity or hit “Create” button to view opportunity information.
-
Pipeline – A sales pipeline is driven by amount and close date of an opportunity. This chart delivers the fundamental information of the opportunity which evaluates the amount with probability percentage.
-
All opportunities – You can view all opportunities by clicking “All opportunities”. You can click on a opportunity name & It will redirect you to Opportunities detail information page.
-
Recently Created – You can view recent opportunities with the click of “Recently created”. It will redirect you to opportunity detail information page.
-
By Queue – You can view opportunities with click of “By Queue”. Here you can view your own opportunity, Your employee opportunity, your team opportunity.
-
To Follow Up – you can view the follow up opportunities by clicking of “To Follow Up”. It will be redirect you to opportunity detail information page.
-
By Sales stage – You can view the opportunity by clicking “By sales stage”. It will display opportunity depend upon the sales stage to be selected.
-
By Market – You can view the opportunity by clicking “Market”. It will display opportunities depend upon the market to be selected.
-
By Territory – You can view the opportunities by clicking “Territory”. It will display opportunities Related to the selected Territory.
-
My Views – You can view the opportunities by clicking “My Views”. It will display opportunities which is viewed by you.
-
Shared Views – You can view the opportunities by clicking “Shared views”. It will display views which is shared by others.
-
Quick Links – You can view the links by click “Quick Links”.
Opportunities Dashboard
The Opportunity dashboard speaks about the people’s activity and able to filter the activity by their name. At once you click the employee name from “People” drop down you can view all the related activities of selected name. And on the right recent opportunities created by employees are displayed with the type, and date of creation.

Opportunities News Feed
The news feed displays all the opportunities related activity, for the convenience you can filter the people’s activity by choosing their name. At the top of the Newsfeed the field called Filter Feed, by which the activity according to the selected name. Choose the employee name by clicking “People” drop down, select the employee name you would like to view for. You can type your own comments in what are you working on? Editor folio and post them. You can seek the News Feed by search Newsfeed above the post folio. This is the master header will follow through every page so you can easily redirect to home,reports and more.
Home
It redirects to the homepage of opportunities. You can quickly view recently created opportunities. It is used to offer a Newsfeed related to the opportunities App. It also provide the link to the individual along with the integrated apps. This is due in part to the communal nature, focusing all the integrated apps, as well as the ease of creation.

Reports
Opportunities App reports support you to keep track of important information in the name of the reports. The report uses a feature of exporting into excel format, sharing the reports with employees.

More
Settings
Opportunities settings allows you to create opportunities with the perspectives you need to record as per your requirement. Opportunities are covered with settings, which attained with such qualities.
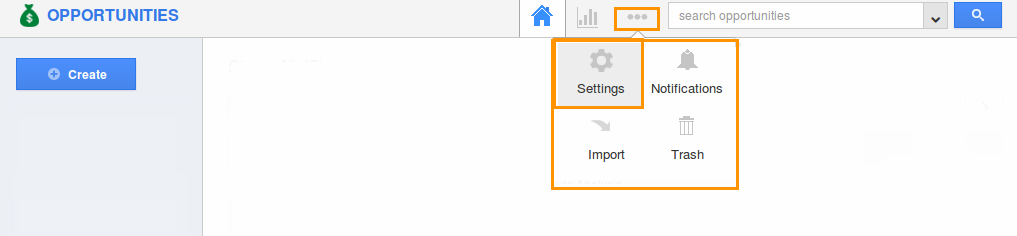
Notification
The Opportunities App is powered by the global notification system in apps. This system allows you to receive updates to your news feed as well as email updates for many different events that can occur within the app. Each employee can configure their own notifications set up. Being a collection of methods that are often incorporated in many diverse settings in various ways, there are documents and notes that are used to utilize the need of News Feeds and Email Feeds for communication.
Trash
Trash feature is an enhanced feature which supports you to track all the deleted opportunities. All the opportunities that were previously deleted are now available in the Trash.
Recent opportunities
Opportunities App provides an extraordinary section of recent opportunities which displays all the opportunities created and modified recently, with the date of creation.
- Easy navigation to recent opportunities.
- Quick view of opportunity with its creation date.
Create Opportunity
An opportunity is the second step of the sales process. Although sometimes you’ll start the process of a new sale by creating an opportunity, usually you want to convert a lead into an opportunity. If you haven’t taken a look at the Leads App yet, head over the Leads App Quick Start Guide to get started with sales force automation. There are still scenarios where you want to create an opportunity without a sales lead first. This will happen if you are working with an existing customer, or you are very confident the deal is likely to proceed forward.
- Entering data in opportunities creation page
- Collecting Opportunities through emails
Enter data in opportunity creation page
- Log in and access Leads App from your universal navigation menu bar.
- Click on “Create Lead” button from the left navigation panel.
- Fill in the following information:
- Name – Name for the opportunity
- Customer – Select customer from predefined list
- Close Date – Choose estimate closed date from calendar picker
- Probability – Set the potential amount
- Sales Stage select sales stage in predefined list.
- Lead source – Select lead source from predefined list .
- Next step – Enter the text for closed deal.
- Assigned to – Select employee who this opportunity will be assigned to, by default, it is assigned to the person creating the opportunity.
- USD – Enter the amount.
- Campaign – Search and select the campaign name.
- Description – Description about opportunities .
- Tags – Search and select the tag related to the opportunity.
Company Information
- Territory – Select a territory from a predefined list.
- Market – Select one/Add new. Segment – Select from predefined list.
Collect opportunities through emails
You can automatically create opportunities when a customer emails you for support. You can use email ids or aliases to receive emails from your customers.
Email authentication
In order to receive emails in opportunities App, you need to authenticate your email address in IMAP settings.
- Receiving Email Account – Your Email address for authentication.
- Password – Enter the password of your email address.
- IMAP Host Name – Host name of your email address for example: if you have Gmail account then host name is “imap.gmail.com”.
- “Addressed To” Email Account – Either you can choose same account or can redirect to email list.
- Port – port number of the domain for example: port number for Gmail is 993.
- Assigned To – Select an Employee to whom it should be assigned automatically.
Comments
0 comments
Please sign in to leave a comment.