Contacts App Documentation
Contacts App manages all your business Contacts, to whom you contact related to business needs (Business to Consumer) flow. The most important function of the contacts module in Apptivo CRM is that they can be used for both customers’ acquisitions as well as procurement of products from the suppliers (vendors). Contacts can be related to an account as well as suppliers (vendors) according to your business process. This is Business-to-Business (B2B) Business-to-Business (B2B) it is a part of the organization details with which you are doing business.
Contact Sharing
Shared Contacts for Gmail allows you to share your Gmail contacts and groups with specific users within your organization directly from your Google Contacts.
Share your Gmail contacts with users, just like you share a Google Doc or Google Calendar. Shared contacts are supported on mobile phones/tablets if you are the user of mobile app.
Integration
Contacts App doesn’t support your business with Contacts; it comes with many other apps to run your business. All apps are deeply integrated which communicate with one another. The qualified Contacts can be converted as customer, or you can consider them as sales leads of your business.
Features
- Entering data in the Contacts creation page
- Contact sharing to your users
- Contact sync from Google
- Capturing Contacts from Email that are configured in Cases
- Associate Contacts with Other Records
- Generate reports to keep track of records
- Converting leads and customer
- Customizing left panel views
- Customizing default column view
Quick Overview
The most common piece of information that businesses need to store is the contact information of the people they interact with. Whether they are customer contacts, industry experts, suppliers, or even just a family member which provides great feedback; managing all of your contacts in a central location is key to keeping a business efficiently. Beyond the importance of managing your personal contacts in one location, it’s even more important for your entire company to have a single address book that employees can share. This ensures your team always has the right information needed to contact those whom your firm does business with.
Setup Steps
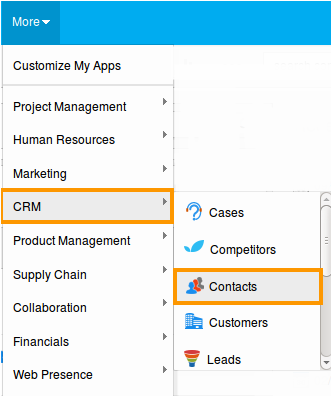
- Log in and access Contacts App from your universal navigationmenu bar.
- Click on “Create” button to create a new contact.
- Click on “Settings” icon to customize Contacts App.

- Create your own custom fields to create a new contact.
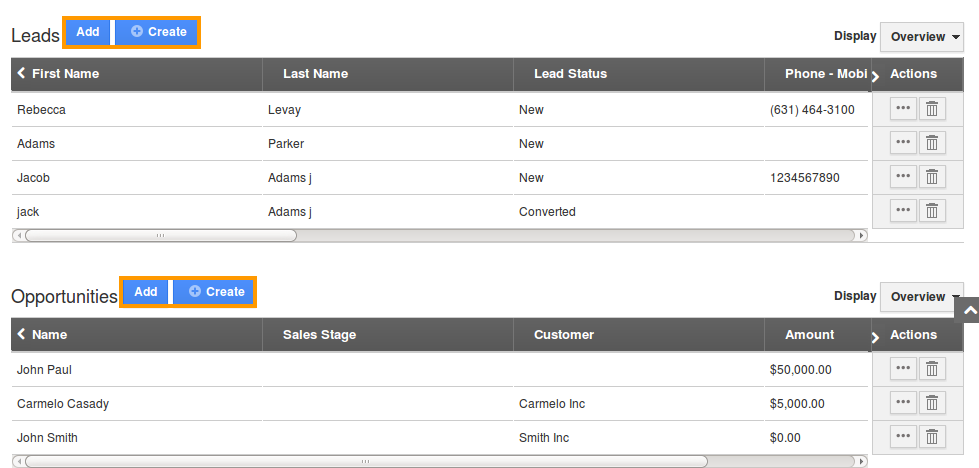
- Associate leads and opportunities to contacts using defined sections.
Features
- Click on “Reports” icon to generate contact reports.

- Click on “Notifications” icon to customize news feed and email feed.

- Click on “Import” to import mass contacts from CSV file.

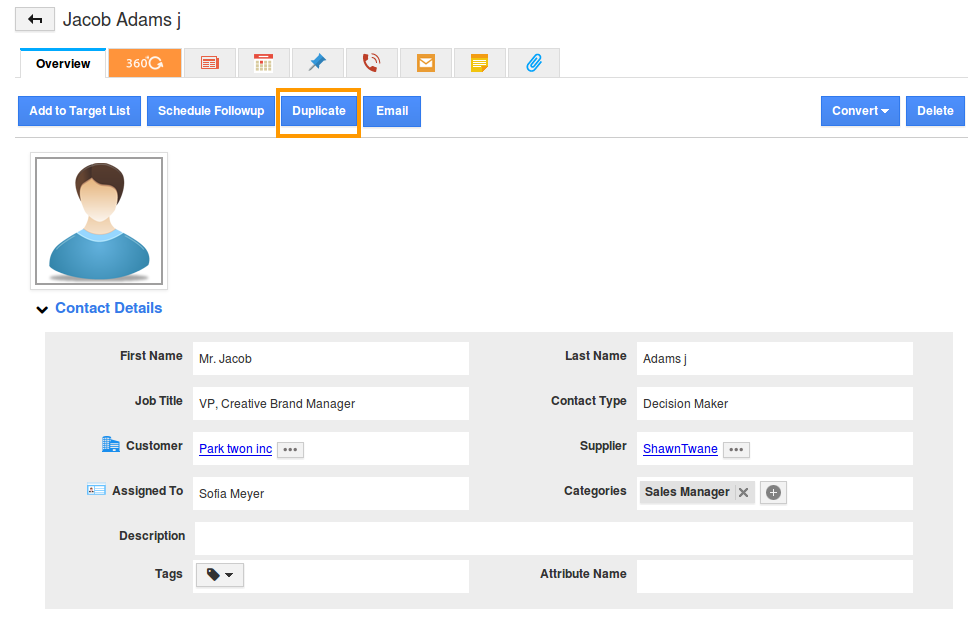
- You can also duplicate a contact using “Duplicate” feature found in App.
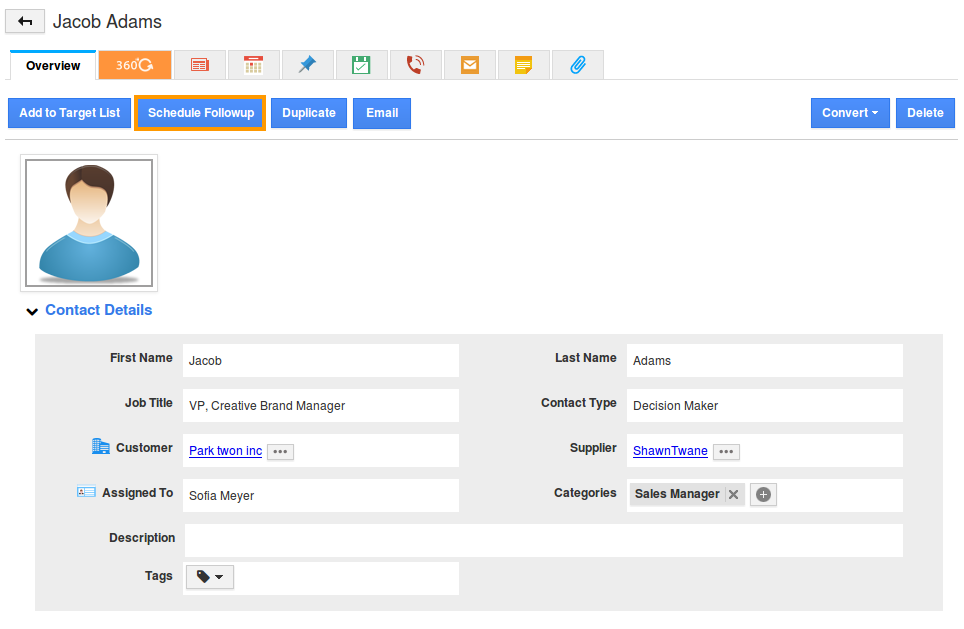
- Click on “Schedule follow up” to schedule the follow up event with contacts.
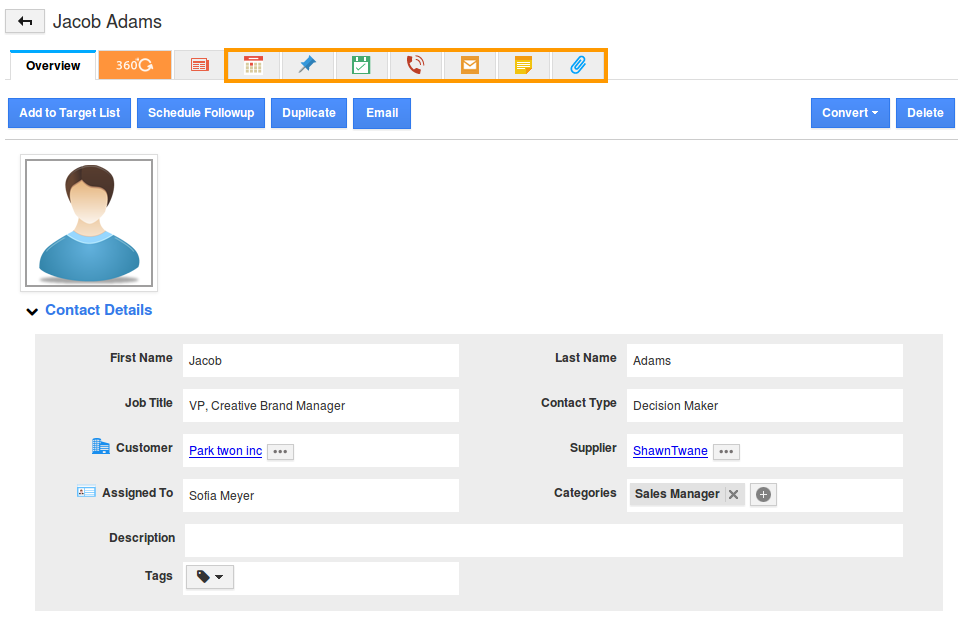
- You can create common activities like appointment, task, call log etc.
- You can perform simple search and advance search for contacts.

Back to Top
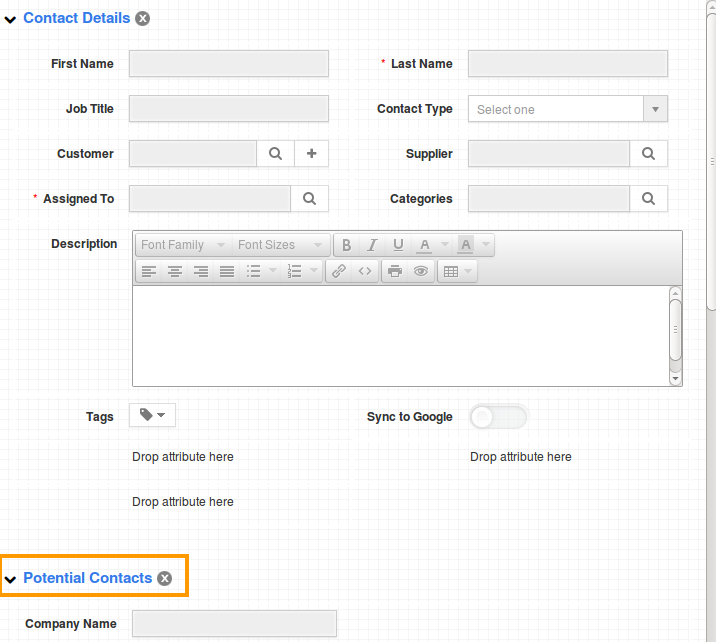
Customization
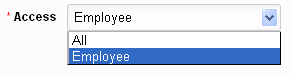
- Data level access security for contacts.
- You can share your contact’s custom attributes through customize app.

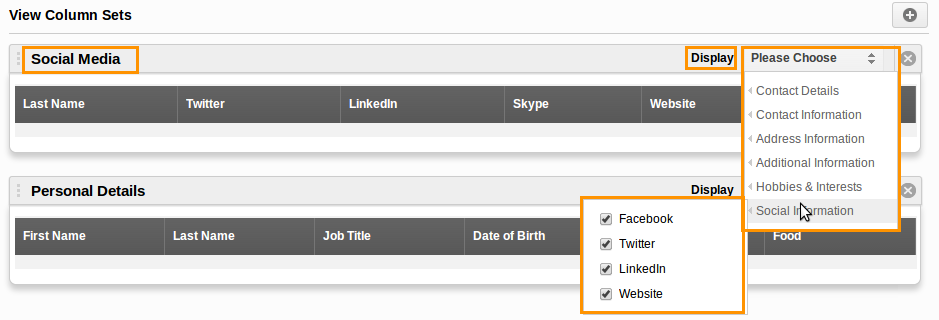
- Save your column set to view your preferred contact fields in dashboard.
- You can also save the current search query as views using “My Views” and also share this views to your contacts through “Shared Views“.
Contacts Attributes
Contact Details
- First Name- Name of the Contact. You are allowed to enter in your own language in “First Name” text field.
- Last Name – Name of the Contact. You are allowed to enter in your own language in “Last Name” text field.
- Job Title – Job title of the Contact. You are allowed to enter in your own language in “Job Title” text field.
- Customer – Select customer from auto suggestion field.
- Referred By – Referrer of the Contact. You can choose referred person from drop down list with click of “Search” button.
- Assigned To – Assigned person of the Contact. You can choose assigned person from drop down list with click of “Search” button.
- Description – Description of the Contact. You are allowed to enter in your own language in “Description” text field.
- Tags – Tag of the Contact. You are allowed to choose tags from “Drop down” box (or) Create a new tag with click of “Add New”.
- Type – Type of the Contact, the value can be selected from predefined list.
- Supplier – Select supplier from auto suggestion field.
Contact Information
- Phone – Phone number of the Contact. You are allowed to enter N no of digits in “Phone Number” field.
- Email – Email of the Contact. You are allowed to enter email id in “Email” text field.
- Skype – Skype name of the Contact. You are allowed to enter skype name in “Skype” text field.
Address Information
- Address Type – Address type of the customer. You can select type of the address with click of”Drop Down” box.
- Address Line 1 – Primary address of the customer. You are allowed enter in your own language in “Address Line1”
- Address Line 2 – Secondary address of the customer. You are allowed enter in your own language in “Address Line2”
- City – City name of the customer. You can enter your own city name in “City” text field.
- Country – Country of the customer. You can select country from drop down list.
- State – State of the customer. You can select state from drop down list
- Zip Code – Zip code of the customer. You can enter postal code in “Zip code” field.
Additional Information
Additional Information of the Contact. You are allowed to enter “Additional Information” about the Contact in your own language.
- Phonetic Name – Phonetic name of the contact.
- Nick Name – The name which is a short form of the contact’s name.
- Date of Birth – Birth date of the person.
- Territory – Territory of the Contact. You can select territory from pre defined list with click of “Search” field.
- Market – Market of the Contact. You can select market from predefined list or create new market with click of “Add New” in drop down box.
- Industry – What industry does he belongs? you can select the industry from predefined list or create new industry with click of “Add New” in drop down box.
- Segment – Segment of the Contact. You can select segment from predefined list or create new segment with click of “Add New” in drop down box.
Social Information
- Facebook – Facebook url of the customer. You are allowed to enter the facebook email address in the “Facebook” field.
- Twitter – Twitter url of the customer. You are allowed to enter Url in the “Twitter” field.
- Linkedin – Linkedin url of the customer. You are allowed to enter Url in the “Linkedin” field.
Contacts Basic Feature
Contacts can be created in 6 different ways:
- Enter contact information manually in contact creation page.
- Import contact records from CSV (Note: You can import up to 5000 contacts records at a time).
- If your account customized with Email to case feature then for each case creation the contact will also be created simultaneously.
- When lead gets converted to contact, the new contact record will be created.
- Import Contact from Google.
- Import Contact from Yahoo.
Trash Feature
- Deleted Contacts
- Archived Contacts
- Restore
- Delete forever
Custom view of Contacts
- My views
- Views shared by others
Access Privileges
- Collaboration
- Custom attributes
- Left panel views
- Reports
Contact Conversion
- Convert contact into customer
- Convert contact into lead
Create Contact
Contacts can be created in 6 different ways:
- Enter contact information manually in contact creation page.
- Import contact records from CSV (Note: You can import up to 5000 contacts records at a time).
- If your account customized with Email to case feature then for each case creation the contact will also be created simultaneously.
- When lead gets converted to contact, the new contact record will be created.
- Import Contact from Google.
- Import Contact from Yahoo.
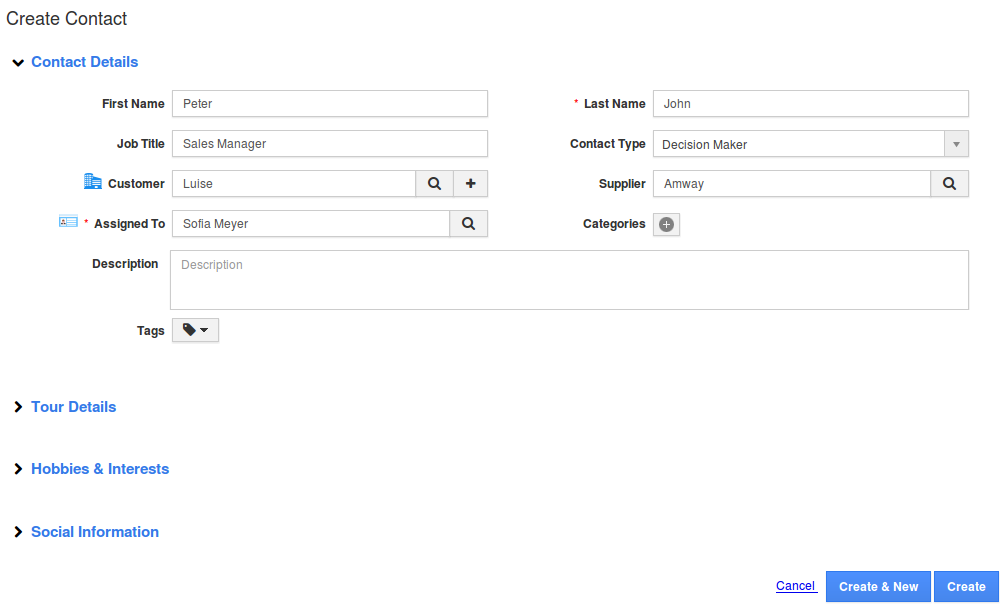
Contact Creation page
Contacts app allows you to create new Contacts using create contact option.
Steps to create contact
- Log in and access Contacts App from your universal navigationmenu bar.
- Click on “Create Contact” button from the left navigation panel.
- Fill in the following information:
- First Name – First name of the Contact.
- Last Name – Last name of the Contact.
- Job Title – Name of the job..
- Contact Type – Choose option for contact.
- Customer – Select Customer from a search option or create new.
- Supplier – Select Supplier from a search option.
- Referred by – Select name of the referrer.
- Assigned to – Select an employee/team.
- Categories – Select Categories from a search option.
- Description – Description about the lead.
- Tags – Select existing tag/ Add new tags.
Contact Information - Phone – Phone number of the lead.
- Fax – Fax number of the lead.
- Email – Email id of the contact.
- Skype – Skype id of the lead.
Address Information - Address Type – Select address type from a predefined list. Enter other address information like city, state etc.
- Click on “Add More Address” to add more addresses.
Additional Information - Phonetic Name – Phonetic name of the contact.
- Nick Name – Nick name of the contact.
- Date of Birth – Date of birth of the contact.
- Market – Select one/Add new.
- Segment – Select from predefined list.
- Territory – Select a territory from a predefined list.
- Industry – Select name of the industry.
Hobbies & Interests - Hobbies – Hobbies of the contact.
- Food – Favourite food of the contact.
Social Information - Facebook – Facebook id.
- Twitter – Twitter id.
- LinkedIn – LinkedIn id.
- Website – Website url.
- Click on “Create” button to complete.
- You can view the created contact as shown in the image below:
Back to Top
Import contacts from CSV
Contacts app allows you to import the contacts from your own resource to it, using Import.This will minimize your work of creating Contacts manually.
Steps to Import Contacts from CSV
- Click on “More” icon and select “Import” icon located at the app header bar.
- Click on “Browse” button and select CSV file from your computer and click on “Next“.
- Map contacts fields to respective CSV fields. Make sure to map the custom mandatory fields.
- Click on “Import” button to import records.
- Note: By default “Sync to Google” option is enabled, if you are trying to import contacts in “Contacts Sync enabled” firm as shown in the image below, this allow you to sync contacts instantly with Google.
- You can view warning popup which alerts you for mapping common fields such as territory, segments etc.
- If you want to continue click on “Import” button or click on “Back” button to include common fields.
- You can view four validation steps:
- Mandatory Values – Validates mandatory value association.
- Data Format – Validates data format issues in CSV.
- Duplicates – Validates duplicates in CSV.
- Reference data – Validates the association of other objects. This will associate existing objects, if there are new objects found in CSV, you are allowed to create new objects.
- Click on “Proceed” button for each step.
- Once the reference data completes, click on “Proceed” button to import records.
- You can view the number of records uploaded and failed.
- You can view completed CSV as shown in the image below:
Back to Top
Convert lead into contact
In order to support the rest of the sales process it’s time to convert the lead information into the other CRM apps. The conversion of lead into a contact that will be associated with the customer.
Steps to convert leads into contact
- Customize “Conversion” setting to enable “Lead to Customer” conversion.
- Create a new lead or select an existing lead to be converted.
- Click on “Convert” button and start conversion.
- You can view the customer creation page, skip to contact creation page as shown in the image below:
Contact Field
Description
Pre populated from Lead?
Name
Name of the contact.
Yes
Description
Description about the contact
Yes
Tags
Tags for the contact
Yes
Category
Select a category from a predefined list.
No
Sales Rep
Name of an Employee.
Yes
Skype
Skype id of contact.
Yes
Address information
Address of the contact
Yes
Territory
Territory of the contact.
Yes
Market
Market of the contact.
Yes
Segment
Segment of the contact.
Yes
- You can view the created contact in Contacts App as shown in the image below:
Conversion flow of lead
- You can convert a lead into an opportunity, the standard lead fields are automatically converted to the opportunity.
- You can convert a lead into a customer, the standard lead fields are automatically converted to the customer.
Import Contact from Google
Contacts App allows you to import the contacts from your own resource to it, using Import.This will minimize your work of creating Contacts manually.
Steps to Import Contacts from Gmail
- Log in and access Contacts App from your universal navigationmenu bar.
- Click on “More” icon and select “Import” located at the app header bar.
- Click on “From Google” from left navigation panel.
- You can view new browser window in which enter your Google account user name and password, click on “Sign in” button.
- Browser window requests for access permission, click on “Accept” button.
- Import Contacts page appears, select contacts from the list.
- Click on “Done” button to complete.
- You can view the groups created as categories in contacts app as shown in the image below:
Note:
If your contacts having same email id as in Apptivo. We will not display the same email id contacts in import pop-up.
Related Links
Read more about:
- Associate contacts with customers while import.
- Import contacts from existing email.
- Import contacts from microsoft outlook.
- Sync contacts to multiple people.
- App integrated with contacts.
Import Contact from Yahoo
Yes! Contacts App has integrated directly with Gmail and Yahoo to make importing your contacts very simple. You’ll be able to perform the import during the account creation process, or you can import directly from the Contacts App at any time.
Steps to Import Contacts from Yahoo
- Log in and access Contacts App from your universal navigation menu bar.
- Click on “More” icon and select “Import” located at the app header bar.
- Click on “From Yahoo” from the left navigation panel.
- Select your account (Yahoo, in your case). A popup window will open, and your email provider will ask for your login details, and permission to share your contacts.
- Once you provide this information, a list of all contacts will appear, and you can check the box next to each contact you’d like to import.
- Click on “Done” button, the import is completed immediately, and all contacts are now available in your app.
Comments
0 comments
Please sign in to leave a comment.